Part 2 in a series of posts on our mold-making process. Check out Part 1 here!
Whooo! It’s been a while since our last post. We’ve been hard at work fabricating our molds and laying up Tachyon’s shell and monocoque.
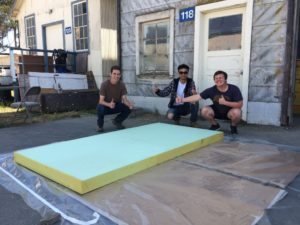
Now for making our molds. As we learned in our design process, “negative” molds are much preferable for making a smooth solar car exterior, and the obvious choice is to shape these directly from foam. This choice was especially tempting when factoring in DUNA-USA’s generous sponsorship of high-density tooling foam. Thank you DUNA-USA for your support!
We considered a few types of foam for this purpose. Polystyrene, the material used in Styrofoam, was one option. It is cheap and readily available, as well as very lightweight. However, it melts at a lower temperature than our prepreg carbon fiber required for curing. It is also chemically incompatible with the primers and gelcoats we intended to use for smoothing the mold surface: we would need additional protective layers, or risk melting the foam with our polyester-based sprays. Thus, it was not a good option for our foam negative mold.
Polyvinyl foam is chemically compatible with polyester primers. It is slightly pricier, but is available in higher densities: we could achieve a better surface finish after milling. It has a higher decomposition temperature than polystyrene, but the softening temperature was still uncomfortably close to our prepreg cure temperature.
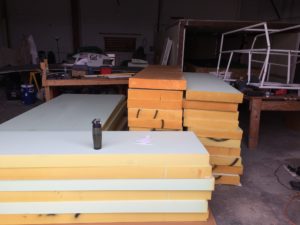
That left polyurethane tooling foam, like the blocks donated by DUNA-USA. It is available in very high densities, which leaves a good surface texture after milling. The foam is also chemically compatible with the chemicals we intended to use, and can withstand the temperatures needed to cure our prepreg. However, large blocks of high-density tooling foam can be very heavy: Tachyon’s negative molds could have been over two thousand pounds!
This ruled out lifting the molds by hand for everyday transport, or into our oven for baking. Our self-built oven could only be accessed through a relatively narrow door. Since the molds would be so long and heavy, the forklifts at our workspace could not lift them from the short ends without tipping over. There was also no room for a long ramp at the oven door, for us to roll the molds into the oven.
In short, tooling foam negative molds would be too heavy for us to move regularly and use. We needed a stiffer and stronger material to make molds that we can transport by hand.
The solution was to make composite negative molds, which would be light enough for us to lift by hand. This required a two-step process. First, we would make positive “patterns” from foam, where the smooth, final surface is on the outside of the mold. Next, we would make our composite negative molds from these patterns, exactly transferring the smooth surface to the inside of the negative molds.
The patterns were only needed once; to make the negative molds. They did not require frequent transport, so weight was no longer such a major concern. With this change in process, DUNA-USA’s polyurethane foam again became the material of choice for us.
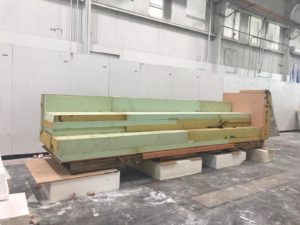
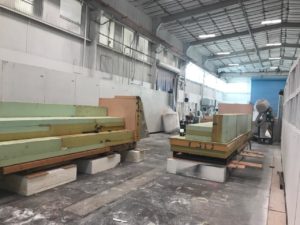
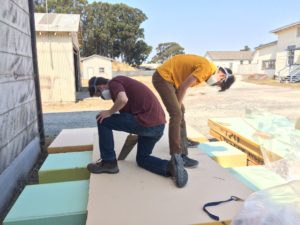
The foam came to us in smaller pieces, so we had to glue them into a large “blank” for milling. This proved to be an interesting challenge. First, our pieces of foam depended on our sponsor’s available inventory: they were not uniform in dimensions or density. We played “Tetris” in our design files to form the blanks from the foam we had available.

We also had to consider the strength of the foam patterns, so that the assembly would not split when forklifted for transport. To ensure this, we staggered the foam pieces whenever possible: this alternated the location of the glue lines, which were likely to be weak points in the structure. We designed a wooden base made from reinforced, extra-long pallets. This added flexural stiffness, while making the structure easier to forklift.
Finally, it was time to enact our CAD designs. We had never glued tooling foam on such a large scale before, so we ran into some unanticipated difficulties in choosing the right adhesive, applying pressure as the glue cured, and finding enough team members to complete the blanks on time.
Our adhesive had to be strong enough to hold the foam together when it was fork-lifted, and easily millable to leave a smooth bond line. It also had to cure without requiring exposure to air: the closed-cell tooling foam would seal off the glue. Finally, it had to cure reasonably fast, so we could add new pieces to the structure in a timely manner.
Our first choice of adhesive was also manufactured by DUNA: DUNAPOL foaming adhesive was strong and fast-curing, and would also foam up to fill the gap between blocks. Unfortunately, we found the foaming to be more than we could handle: it applied more pressure than we could counteract with weights or clamps. Vacuum-bagging the glued foam pieces ensured a great bond line, but would take too long to enact for our whole molds.

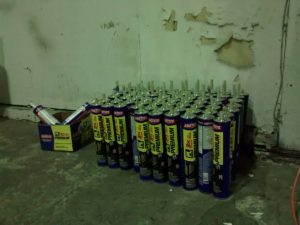
We heard of other teams using Gorilla Glue with great success, but decided to try Loctite construction adhesive as a cheaper alternative. This is what we used to glue the majority of our foam blocks together. Spritzing the glue with water ensured that it would react to form a strong bond. However, the glue did not expand much to fill gaps in the foam: we decided to patch these after milling, and forged onwards.
Applying pressure was our next major challenge. We needed to force the foam pieces together while the glue cured, in order to form a strong bond. This was easier said than done: the whole blank was too wide for off-the shelf clamps, and we found vacuum bagging to be much too slow. We found that ratchet straps worked for applying pressure, but they were harder to use than clamps. Eventually, we settled on a two-step process: use clamps and weights for smaller sub-assemblies of 2-3 blocks, then use ratchet straps to hold the sub-groups into the completed blank.
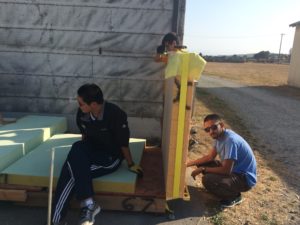
Finally, we needed a lot of personnel to complete the foam gluing. The high-density foam blocks required multiple members to lift, and the adhesive curing time meant that we could not complete the blank in one sitting. We needed to field a large working crew, day after day.
Fortunately, we could leverage our large team of dedicated members. Our composites team was not able to perform all of the work, so we set up a comprehensive rotation system to share the load between different subteams. This prevented fatigue for individual members as we sent out full cars of members on every day of the week. Thank you to everyone who contributed to this titanic effort!
After weeks of hard work, the completed foam blanks were ready for milling and finishing. Check out Part 3 of this series in the not-too-distant future!